
Table of Contents
Introduction
Hats are more than just accessories; they’re a canvas for personal expression and style. Whether you’re looking to revamp an old favorite or create a brand-new headpiece, DIY hat customization offers a fantastic opportunity to make your headwear truly unique. By adding your personal touch, you can transform a simple hat into a statement piece that reflects your personality and creativity.
In this guide, we’ll explore various techniques and materials for customizing your hat, from painting and embroidery to adding accessories and distressing. Whether you’re a crafting novice or a seasoned DIY enthusiast, these tips and tricks will help you create a one-of-a-kind hat trend that stands out from the crowd. Get ready to unleash your creativity and turn your hat into a personalized masterpiece!
Overview of DIY Hat Customization
DIY hat customization allows you to take a basic hat trend and turn it into something uniquely yours. This creative process involves using various materials and techniques to add personal touches, whether through painting, embroidery, iron-on transfers, or adding decorative elements. The beauty of DIY customization lies in its versatility—there are no limits to what you can achieve, from bold, artistic designs to subtle, refined details.
The customization process can range from simple modifications, such as adding a hat size band or painting a small design, to more elaborate projects involving intricate embroidery or mixed media. With a bit of imagination and the right materials, you can transform any hat into a reflection of your individual style and taste.
Benefits of Personalizing Your Headwear
- Unique Expression: Customizing your hat ensures that you have a one-of-a-kind accessory that stands out. It’s an opportunity to express your personality, showcase your creativity, and make a fashion statement that’s distinctly yours.
- Enhanced Creativity: Engaging in DIY projects stimulates creativity and problem-solving skills. You can experiment for men with various techniques, colors, and designs, leading to innovative and personalized results.
- Cost-Effective: Customizing your own hat can be a more affordable alternative to buying designer or branded headwear. It allows you to create high-quality, personalized pieces at a fraction of the cost.
- Personal Connection: There’s something special about wearing an item that you’ve created yourself. Custom men hats carry personal meaning and can become treasured keepsakes, making them perfect gifts or memorable additions to your wardrobe.
- Sustainability: Customizing old or thrifted winter hats contributes to a more sustainable fashion practice. It’s a great way to give new life to pre-existing items, reducing waste and promoting eco-friendly fashion choices.
Materials Needed
To embark on your DIY hat customization journey, you’ll need a range of materials and tools. Here’s a comprehensive list to help you get started:
Fabric Paint or Markers
- Fabric Paint: Ideal for creating vibrant and durable designs on your hat. Available in various colors and finishes, including matte, glossy, and metallic.
- Fabric Markers: Great for detailed designs and adding fine lines or text. They come in a range of colors and tip sizes, making them versatile for different styles of artwork.
Embroidery Kit
- Embroidery Thread: Choose colors that complement or contrast with your hat. Threads come in various types, including cotton, silk, and metallic.
- Embroidery Needles: These needles are designed for sewing through fabric with ease.
- Hoop: Keeps the fabric taut while you work on your embroidery design.
- Pattern or Design Templates: Helps guide your stitching and ensures consistency.
Iron-On Transfers
- Transfer Sheets: Pre-designed or custom-made graphics that can be applied to your hat using heat. Ensure the transfer sheets are compatible with the fabric of your hat.
- Iron: Used to apply the transfers. Make sure to follow the transfer sheet’s instructions for temperature and time.
Hat Bands or Ribbons
- Hat Bands: Available in various materials such as leather, fabric, or faux fur. They can be used to add a stylish or classic touch.
- Ribbons: Perfect for adding a splash of color or a decorative flair. Choose ribbons that match or contrast with your hat’s color.
Beads, Sequins, or Buttons
- Beads: Adds texture and sparkle. They can be sewn or glued onto your hat for a decorative effect.
- Sequins: Reflective elements that bring a touch of glamour. Apply them with fabric glue or sew them on.
- Buttons: Use for a classic or whimsical look. They can be sewn or glued onto the hat.
Fabric Glue or Hot Glue Gun
- Fabric Glue: A strong adhesive designed for fabric that ensures decorations stay in place. Ideal for gluing on patches or embellishments.
- Hot Glue Gun: Provides a quick and strong bond for attaching decorations. Use with caution to avoid burns.
Stencils
- Design Stencils: Help you achieve precise and consistent patterns or designs. They can be used with paint or markers to create clean, professional-looking results.
Additional Tools
- Scissors: For cutting fabric, ribbons, or other materials.
- Tweezers: Useful for placing small embellishments like beads or sequins.
- Fabric Chalk or Pencil: For sketching out designs before applying paint or embroidery.
With these materials and tools at your disposal, you’ll be well-equipped to start personalizing your hat and turning it into a unique expression of your style.
Customization Techniques
DIY hat customization offers a wide array of techniques to help you achieve the perfect personalized look. Each method has its own unique approach, allowing you to explore different styles and finishes. Here’s a guide to some popular customization techniques:
Painting
Overview: Painting is a versatile technique that lets you create vibrant, custom designs on your hat.
Materials Needed: Fabric paint or markers, brushes, stencils (optional)
Steps:
- Preparation: Clean the hat to ensure a smooth surface for painting. Use a fabric primer if needed.
- Design: Sketch your design on paper or directly onto the hat using fabric chalk.
- Painting: Use fabric paint or markers to apply your design. Work in layers if necessary, allowing each layer to dry before adding more.
- Setting: Allow the paint to dry completely. Some paints may require heat setting, so follow the manufacturer’s instructions.
Tips:
- Use stencils for precise designs.
- Experiment with different brush sizes and techniques for varied effects.
Embroidery
Overview: Embroidery adds texture and a touch of craftsmanship to your hat, perfect for detailed designs.
Materials Needed: Embroidery kit (thread, needles, hoop), pattern or design templates
Steps:
- Design: Choose or create a design for embroidery. Transfer the design onto the hat using fabric chalk or a water-soluble pen.
- Hooping: Place the hat in the embroidery hoop to keep the fabric taut.
- Embroidery: Stitch the design using your chosen thread colors and techniques (e.g., satin stitch, backstitch).
- Finishing: Remove the hat from the hoop and trim any excess threads. Gently press the hat to remove any hoop marks.
Tips:
- Practice on a scrap piece of fabric before working on your hat.
- Use different stitch types to create texture and depth.
Iron-On Transfers
Overview: Iron-on transfers allow you to apply pre-made designs to your hat quickly and easily.
Materials Needed: Iron-on transfer sheets, iron, parchment paper
Steps:
- Design: Choose a transfer design and cut it out if necessary.
- Preparation: Preheat your iron according to the transfer sheet’s instructions. Place the transfer on the hat, and cover it with parchment paper.
- Application: Iron over the parchment paper with firm pressure for the time specified on the transfer instructions.
- Peeling: Let the hat cool slightly before carefully peeling away the transfer paper.
Tips:
- Make sure to follow the transfer sheet’s specific instructions for temperature and time.
- Test on a small area first to ensure proper adhesion.
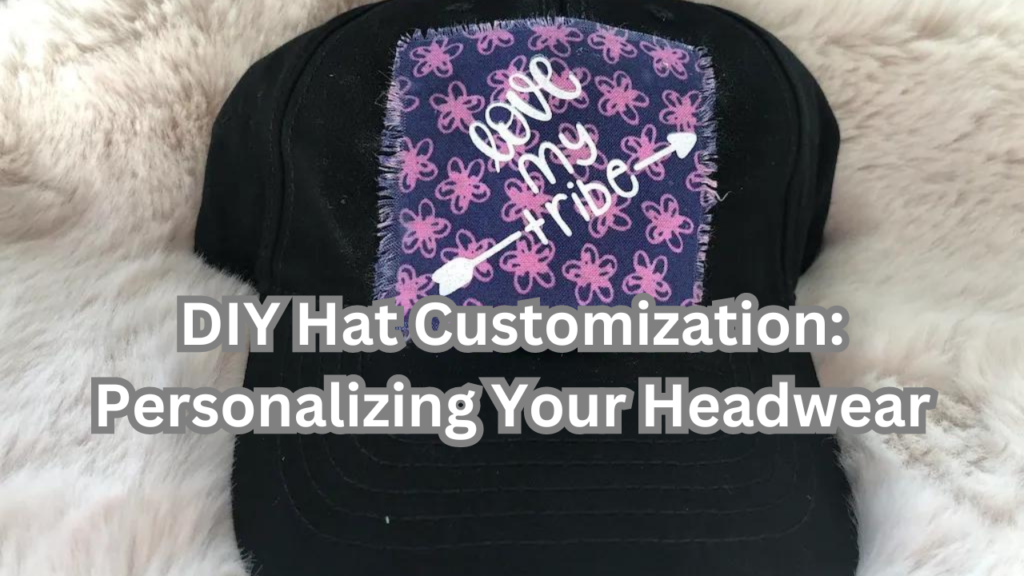
Adding Accessories
Overview: Adding accessories such as hat bands, ribbons, beads, or buttons can elevate your hat’s appearance with minimal effort.
Materials Needed: Hat bands, ribbons, beads, buttons, fabric glue or hot glue gun
Steps:
- Planning: Decide where and how you want to place your accessories. Arrange them on the hat to visualize the final look.
- Attachment: Use fabric glue or a hot glue gun to attach the accessories. For buttons or beads, you may need to sew them on for added durability.
- Securing: Allow the glue to dry completely before wearing the hat.
Tips:
- Combine different types of accessories for a unique look.
- Ensure attachments are secure to avoid losing them during wear.
Distressing
Overview: Distressing techniques give your hat a worn-in, vintage look, perfect for a casual, laid-back style.
Materials Needed: Sandpaper, scissors (optional), fabric dye (optional)
Steps:
- Planning: Decide on the areas of the hat you want to distress.
- Distressing: Gently rub sandpaper on the fabric to create a distressed effect. For a more rugged look, you can also cut or fray the fabric.
- Dyeing (Optional): Apply fabric dye if you want to add a faded or weathered appearance.
Tips:
- Test distressing techniques on a small, inconspicuous area first.
- Go slowly and gradually to avoid over-distressing.
With these techniques, you can transform your hat into a personalized accessory that reflects your individual style and creativity. Feel free to mix and match methods to achieve your desired look.
Tips for Successful Customization
To ensure your DIY hat customization project turns out exactly as you envision, follow these practical tips and guidelines:
1. Test Materials First
Before applying any paint, glue, or other materials to your hat, always test them on a small, inconspicuous area or a scrap piece of fabric. This helps you check for any adverse reactions and ensures the colors and adhesives work as expected.
2. Prepare Your Hat
Make sure your hat is clean and free of any dirt or oils. If needed, wash and dry it thoroughly before starting your customization. A clean surface helps paint and adhesives adhere better, leading to a more professional finish.
3. Plan Your Design
Sketch your design on paper or use design software to visualize how it will look on your hat. You can also use fabric chalk or a water-soluble pen to outline your design on the hat before applying permanent materials. Planning helps avoid mistakes and ensures a cohesive look.
4. Work in a Well-Ventilated Area
When using materials like fabric paint, markers, or glue, work in a well-ventilated space to avoid inhaling fumes. Ensure the area is clean and free of dust or debris to prevent contamination of your design.
5. Use the Right Tools
Choose appropriate tools for each technique. For example, use fabric brushes for painting, embroidery needles for stitching, and fabric glue for attaching accessories. Using the correct tools ensures better results and helps you achieve the desired effect.
6. Follow Instructions Carefully
Whether you’re using iron-on transfers, fabric paint, or glue, always follow the manufacturer’s instructions regarding application, drying times, and heat settings. This will help you achieve the best results and avoid common issues.
7. Be Patient
Allow each layer of paint, glue, or embroidery to dry completely before adding additional layers or handling the hat. Rushing the process can lead to smudging, uneven results, or damage to your design.
8. Experiment with Techniques
Don’t be afraid to experiment with different techniques and materials. Combining various methods, such as painting and embroidery, can lead to unique and creative results. Practice on scrap fabric or old hats to build your skills and confidence.
9. Secure Attachments Properly
Ensure that any beads, buttons, or other accessories are securely attached. For added durability, sew or use fabric glue to keep embellishments in place. Double-check that everything is firmly attached before wearing the hat.
10. Care for Your Customized Hat
Once your hat is customized, follow proper care instructions to maintain its appearance. Hand wash or spot clean as needed, and avoid exposing it to harsh conditions that could damage your design. Store it in a cool, dry place to preserve its quality.
By following these tips, you can achieve a beautifully customized hat that reflects your personal style and stands the test of time. Happy customizing!
Conclusion
Customizing your hat is more than just a creative endeavor—it’s an opportunity to express your individuality and make a personal statement. Whether you’re painting intricate designs, adding stylish embroidery, or embellishing with unique accessories, each step in the customization process allows you to create a one-of-a-kind accessory that stands out from the crowd.
By exploring various techniques and utilizing the right materials, you can transform a simple hat into a personalized masterpiece that reflects your style and creativity. Remember to plan your design, use the appropriate tools, and follow best practices for application and care. With patience and experimentation, you can achieve stunning results that turn your hat into a cherished and unique part of your wardrobe.
Embrace the fun of DIY customization, and let your imagination guide you. Whether you’re crafting a statement piece for yourself or creating a thoughtful gift for someone else, the possibilities are endless. Enjoy the process and celebrate your creativity as you bring your vision to life!
Summary of Customization Options
In this guide, we’ve explored a variety of techniques to help you personalize your perfect hat and make it uniquely yours. From vibrant painting and detailed embroidery to convenient iron-on transfers and stylish accessory additions, each method offers a distinct way to transform your hat into a custom piece. Whether you opt for a bold design or subtle embellishments, these techniques allow you to showcase your creativity and style.
Encouragement to Explore Personal Style
Customizing your hat is an exciting opportunity to express yourself and embrace your personal style. Don’t be afraid to experiment with different materials, designs, and techniques to find what resonates with you. The process of creating something unique is as rewarding as the final result, and each hat you customize becomes a reflection of your individuality.
Dive into the world of DIY hat customization with confidence, knowing that your creativity is the only limit. Have fun exploring various options, and let your personal style shine through your custom headwear. Whether you’re revamping an old favorite or starting fresh, your customized hat will be a one-of-a-kind accessory that tells your story.