
Table of Contents
Introduction
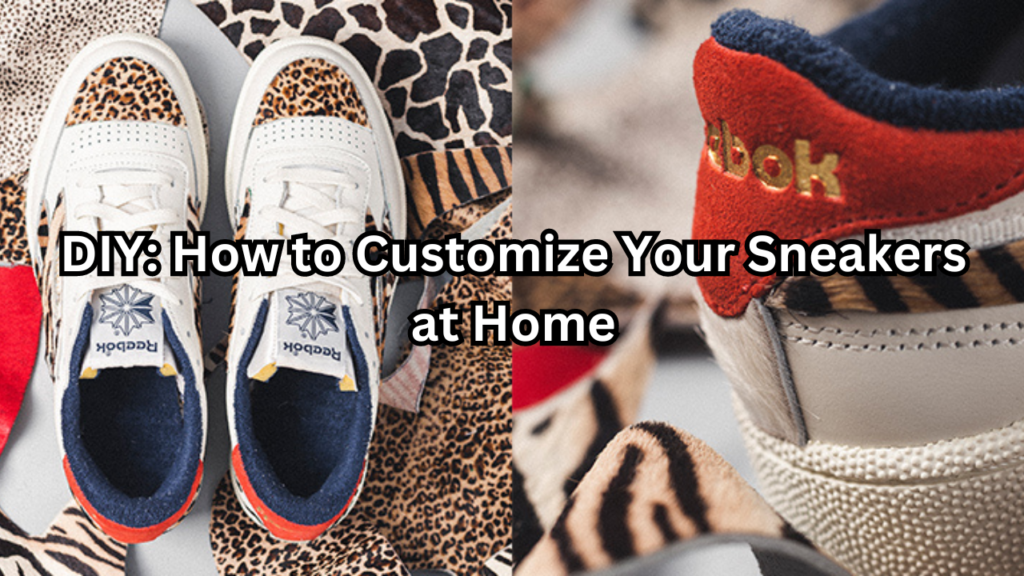
In the ever-evolving world of fashion, sneakers have emerged as more than just a practical choice for footwear—they’ve become a canvas for self-expression and creativity. Customizing sneakers at home has become a popular trend, offering enthusiasts the opportunity to transform their footwear into personalized works of art. This hands-on approach not only adds a unique touch to your style but also allows you to stand out from the crowd. Whether you’re an artist at heart or simply looking to refresh an old pair of sneakers, the DIY customization trend provides an exciting avenue to explore your creativity.
Brief Overview of the DIY Sneaker Customization Trend
The DIY sneaker customization trend has gained momentum in recent years, driven by the desire for individuality in fashion. Platforms like Instagram and TikTok are brimming with creative sneaker designs, inspiring countless individuals to embark on their own customization journeys. From hand-painted designs and intricate patterns to bold color schemes and personalized text, the possibilities are endless. This trend has been further fueled by the availability of specialized materials and tutorials, making it easier than ever for people to dive into sneaker customization. It’s not just about making a fashion statement—it’s about crafting a piece of art that reflects your personal style and identity.
Benefits of Customizing Your Own Sneakers
Customizing your own sneakers offers a range of benefits that extend beyond mere aesthetics:
- Personal Expression: Custom sneakers allow you to showcase your personality and creativity. Whether you prefer vibrant colors, intricate designs, or minimalist patterns, your sneakers can be a reflection of who you are.
- Unique Style: By customizing your sneakers, you ensure that your footwear stands out. In a world where trends quickly become mainstream, a pair of custom sneakers offers a distinctive style that’s uniquely yours.
- Creative Outlet: Engaging in sneaker customization provides a satisfying creative outlet. It’s an opportunity to experiment with different designs, techniques, and colors, allowing you to channel your artistic energy into a tangible project.
- Cost-Effective: Customizing a pair of sneakers can be more affordable than purchasing high-end designer shoes with unique designs. With a few basic materials, you can create a one-of-a-kind pair that rivals more expensive options.
- Sustainable Fashion: Customizing old sneakers is a sustainable way to breathe new life into footwear that might otherwise be discarded. It’s an eco-friendly approach that helps reduce waste while keeping your style fresh and current.
By embracing DIY sneaker customization, you’re not just altering your footwear—you’re creating a personal statement that reflects your unique style and creative flair.
Gathering Materials
Customizing sneakers requires a few essential tools and materials to ensure a successful and high-quality result. Here’s a comprehensive list of what you’ll need to get started on your DIY sneaker project.
List of Essential Tools and Materials
To begin with, you’ll need a pair of sneakers that you’re ready to transform. For best results, choose a pair that is clean and in good condition; white or light-colored sneakers are ideal as they provide a blank canvas for your designs. Next, high-quality acrylic paints are essential. Opt for paints designed specifically for fabric or leather, depending on your sneaker type, as they offer flexibility and durability. Alongside paints, a variety of paintbrushes will be necessary, including fine-tipped brushes for detailed work and broader ones for covering larger areas. Painter’s tape is crucial for masking off areas you don’t want to paint, ensuring clean lines and protecting parts of your sneakers from unwanted paint splatters. Fabric markers or pens are also useful for adding intricate designs or making touch-ups. A clear acrylic sealer is essential for protecting your artwork and ensuring its longevity, guarding against scuffs and fading. Finally, cotton swabs and rubbing alcohol will help in cleaning and prepping the sneaker surface, while a palette or mixing tray allows for blending colors and creating custom shades.
Tips for Selecting the Right Materials Based on Sneaker Type
Selecting the right materials based on the type of sneakers you are customizing is crucial for achieving the best results. For canvas sneakers, choose acrylic paints that are specifically designed for fabric. These paints adhere well to the porous surface and remain flexible, moving with the sneaker. Fabric markers can also be beneficial for adding detailed designs. When working with leather or synthetic leather sneakers, opt for acrylic paints made for leather surfaces. These paints are formulated to bond with the smooth, non-porous material and resist cracking. Ensure you use a clear acrylic sealer designed for leather to protect your design. Customizing suede sneakers presents a challenge due to their texture. Use paints or markers specifically made for suede and conduct a test on a small, inconspicuous area first. Suede cleaners and protectors can help maintain the look of your customized sneakers. For mesh sneakers, which have a breathable fabric, use fabric paints designed to adhere to synthetic materials. It’s important to choose paints that are flexible to avoid cracking as the material stretches.
Preparing Your Sneakers
Before diving into the customization process, it’s crucial to properly prepare your sneakers. This preparation ensures that your design adheres well and lasts over time.
Cleaning and Prepping the Sneakers for Customization
The first step in preparing your sneakers is to clean them thoroughly. Start by removing any dirt or grime from the surface. Use a damp cloth or sponge with mild soap and water to gently scrub away any visible stains. For stubborn spots, a soft-bristled brush can be effective. Be sure to clean both the exterior and the soles of your sneakers to remove any residues that might interfere with paint adhesion. After cleaning, allow the sneakers to dry completely before moving on to the next steps. If you’re working with leather or synthetic materials, lightly sand the surface to create a better grip for the paint. This helps in achieving a smooth and even application.
Importance of Removing Laces and Any Dirt or Grime
Removing the laces and insoles from your sneakers is a critical part of the preparation process. Laces can easily get paint on them, leading to a messy and uneven look. Additionally, leaving the insoles in place may hinder your ability to reach certain areas of the sneaker and can trap paint underneath, affecting the overall finish. By removing these components, you ensure that you have a clean, unobstructed surface to work on. Moreover, removing any dirt or grime is essential, as even small amounts of debris can prevent the paint from adhering properly, leading to an uneven and less durable design. Taking the time to thoroughly clean and prep your sneakers will pay off in the final result, providing a professional and polished look to your custom designs.
Design Planning
Women’s design planning is a crucial step in the sneaker customization process. It involves brainstorming and visualizing ideas tailored to women styles and preferences, ensuring a cohesive and appealing final design. Here’s how to effectively plan your sneaker design:
Sketching Out Your Design Ideas
Begin by sketching out your design ideas on paper. This initial step allows you to explore different concepts and visual elements without committing to paint. Start with rough sketches to outline the overall design and layout, including any patterns, images, or text you want to incorporate. Consider the sneaker’s shape and surface areas to ensure that your design complements its structure. Don’t be afraid to experiment with various styles and arrangements. Once you have a basic idea, refine your sketches, focusing on details and ensuring that the design flows well across the sneaker’s different parts. This stage is about translating your creative vision into a tangible plan.
Choosing Colors and Patterns
Selecting the right colors and patterns is key to bringing your design to life. Choose colors that align with your vision and work well together. Consider using a color wheel to help with color harmony and contrast. When selecting patterns, think about how they will appear on the sneaker’s surface and how they will interact with other design elements. Test color combinations and patterns by creating small swatches or digital mock-ups. This will help you visualize how different elements will look together and make any necessary adjustments before you start painting.
Using Design Software or Templates for Inspiration
To further refine your design, consider using design software or templates. Software programs like Adobe Illustrator or free tools like Canva offer features that allow you to create digital mock-ups of your sneaker designs. These tools let you experiment with colors, patterns, and layouts on a virtual sneaker, helping you visualize your ideas more clearly. Additionally, exploring design templates and inspiration online can provide valuable insights and spark new ideas. Websites like Pinterest and Instagram are excellent resources for finding creative designs and trends that might influence your own project. By leveraging these tools and sources of inspiration, you can create a well-thought-out and visually compelling sneaker design.
Painting Techniques
Customizing your sneakers involves applying paint with precision and care to achieve a professional finish. Here’s a step-by-step guide to help you with the painting process:
Step-by-Step Guide to Applying Paint
- Apply Base Coats: Start with a base coat to establish the primary color of your design. Use a broad brush or sponge to apply an even layer of paint over the areas you want to cover. Ensure the base coat is smooth and fully dried before proceeding to the next step. This base layer provides a foundation for your design and helps the subsequent layers adhere better.
- Layering: Once the base coat is dry, begin layering additional colors or details. Apply each layer gradually, allowing each one to dry completely before adding the next. This technique helps in building depth and achieving a more vibrant and durable finish. Use fine-tipped brushes for detailed work and smaller areas. Remember to work in thin layers to avoid paint buildup and ensure even coverage.
Tips for Achieving Clean Lines and Smooth Finishes
To achieve clean lines and a smooth finish, precision is key. Use painter’s tape to mask off areas you want to keep paint-free and create sharp edges. For intricate designs, use fine-tipped brushes or paint pens to ensure accuracy. If you notice any paint drips or smudges, gently clean them while the paint is still wet using a cotton swab and a bit of water or rubbing alcohol. For a smooth finish, ensure each layer of paint is dry before applying the next, and use a clear acrylic sealer once your design is complete to protect the paint and give it a glossy, professional look.
How to Fix Common Painting Mistakes
Mistakes can happen, but most can be easily fixed. If you accidentally apply paint outside your intended area, use a cotton swab dipped in rubbing alcohol to gently remove the excess paint while it is still wet. For dried paint errors, carefully scrape off the mistake with a craft knife and repaint the area. If the paint starts to crack or peel, ensure you’ve applied a sufficient base coat and used a flexible acrylic paint designed for the material of your sneakers. Applying a clear acrylic sealer can also help prevent future issues.
Adding Details
Adding intricate details is where your custom design truly shines. Here’s how to enhance your sneakers with fine details:
Techniques for Adding Intricate Details
- Stencils: Use stencils to add precise and consistent details to your sneakers. Create or purchase stencils that match your design. Place the stencil on the sneaker and secure it with painter’s tape. Apply paint carefully over the stencil, ensuring even coverage. Remove the stencil gently while the paint is still wet for clean, defined edges.
- Freehand Designs: For a more personalized touch, you can paint designs freehand. Use fine-tipped brushes or paint pens for intricate details and small areas. Steady your hand and work slowly to ensure precision. Practice on paper or a scrap piece of fabric first to refine your technique.
Incorporating Additional Materials
In addition to paint, fabric markers and patches can enhance your design. Fabric markers are excellent for adding fine lines and text with ease. Simply draw directly onto the sneaker, and allow the marker ink to dry completely. For a unique touch, consider adding patches or appliqués. Sew or glue these to your sneakers to add texture and dimension. Ensure any additional materials are securely attached and compatible with the sneaker’s material to avoid peeling or damage.
Finishing Touches
After completing your sneaker customization, adding the finishing touches is essential to ensure the longevity and polished appearance of your work.
Applying a Protective Coating or Sealant
To protect your custom design and ensure its durability, apply a clear acrylic sealer or protective coating. This step helps guard against scuffs, scratches, and fading. Choose a sealer that is compatible with the type of paint and sneaker material you used. Apply the sealer evenly over your entire design, following the manufacturer’s instructions. Allow it to dry completely before handling or wearing your sneakers. This protective layer not only enhances the longevity of your artwork but also gives your sneakers a glossy, professional finish.
Reattaching Laces and Additional Accessories
Once your design and protective coating are fully dried, reattach the laces and any other accessories you removed during the customization process. If your laces were painted or altered, ensure they are thoroughly dry before putting them back. You can also consider adding new laces or accessories to complement your custom design. For instance, colorful or patterned laces can enhance the overall look and provide a fresh touch. Ensure that all components are securely attached and properly aligned to maintain the functionality and aesthetic of your sneakers.
Caring for Your Customized Sneakers
Proper care and maintenance are crucial to keep your customized sneakers looking their best and lasting longer.
Tips for Cleaning and Maintaining Your Customized Sneakers
To clean your customized sneakers, use a soft cloth or sponge with mild soap and water. Avoid using harsh chemicals or abrasive scrubbers, as these can damage the paint or design. Gently wipe the surface and avoid soaking the sneakers. For stubborn stains, spot clean with a small amount of rubbing alcohol and a cotton swab, testing on a small area first to ensure it doesn’t affect the design. Regularly check for any signs of wear or damage and address them promptly to prevent further issues.
How to Store Them Properly to Avoid Damage
Store your customized sneakers in a cool, dry place away from direct sunlight to prevent fading. Use shoe trees or stuff them with paper to maintain their shape and prevent creasing. Keep them in a dust bag or box to protect them from dust and environmental damage. Avoid storing them in damp or humid areas, as moisture can affect both the paint and the sneaker material. Proper storage ensures that your custom designs remain vibrant and the sneakers stay in excellent condition.
Showcasing Your Work
Once your sneakers are customized and well-maintained, it’s time to showcase your creative work to the world.
Ideas for Sharing Your Custom Designs
Share your custom sneakers on social media platforms like Instagram, TikTok, and Pinterest. Use hashtags related to sneaker customization and your design style to reach a broader audience. Consider creating a dedicated account or portfolio to feature your sneaker designs and track your progress. Joining sneaker communities and forums can also be a great way to share your work and connect with other enthusiasts. Participate in challenges or contests to gain visibility and showcase your talent.
Encouraging Feedback and Engaging with Fellow Enthusiasts
Encourage feedback by asking for comments and suggestions from your followers and fellow sneaker enthusiasts. Constructive feedback can help you improve your skills and gain new perspectives. Engage with your audience by responding to comments, participating in discussions, and supporting other artists in the community. Building relationships with fellow enthusiasts not only helps you grow as a designer but also fosters a sense of camaraderie and shared passion for sneaker customization.
Conclusion
Customizing your sneakers is a rewarding and creative process that allows you to transform a simple pair of shoes into a unique piece of art. By following the steps of gathering materials, planning your design, applying paint, and adding intricate details, you can create a personalized look that reflects your individual style.
Recap of the Customization Process
To recap, the customization process begins with carefully gathering the right materials, including high-quality paints, brushes, and protective sealers. Preparing your sneakers by cleaning and prepping them ensures a smooth application of paint. Planning your design through sketching, selecting colors, and using design software helps you visualize the final product. Applying paint in layers and adding detailed touches with stencils or markers allows you to achieve a polished and professional look. Finally, protecting your work with a clear coating and properly storing your sneakers maintains their appearance and longevity.
Encouragement to Experiment and Create Unique Designs
Don’t be afraid to experiment and push the boundaries of your creativity. Customizing sneakers is an opportunity to express your personality and explore new artistic techniques. Whether you’re creating bold patterns, intricate details, or incorporating mixed media, your designs are a reflection of your creativity. Each pair of customized sneakers is a unique piece that stands out and tells a story. Embrace the chance to innovate and let your imagination guide you through the customization process.
Final Thoughts on the Satisfaction of DIY Projects
There’s a distinct satisfaction that comes from completing a DIY project, especially one as personal and creative as sneaker customization. Seeing your ideas come to life and wearing a pair of sneakers that you’ve uniquely designed brings a sense of accomplishment and pride. DIY projects not only allow you to create something beautiful but also provide an opportunity to develop new skills and enjoy the process of making something truly your own. As you embark on your sneaker customization journey, remember that each step is an opportunity for creativity and self-expression. Enjoy the process, celebrate your results, and take pride in the art of DIY.