
Table of Contents
Introduction
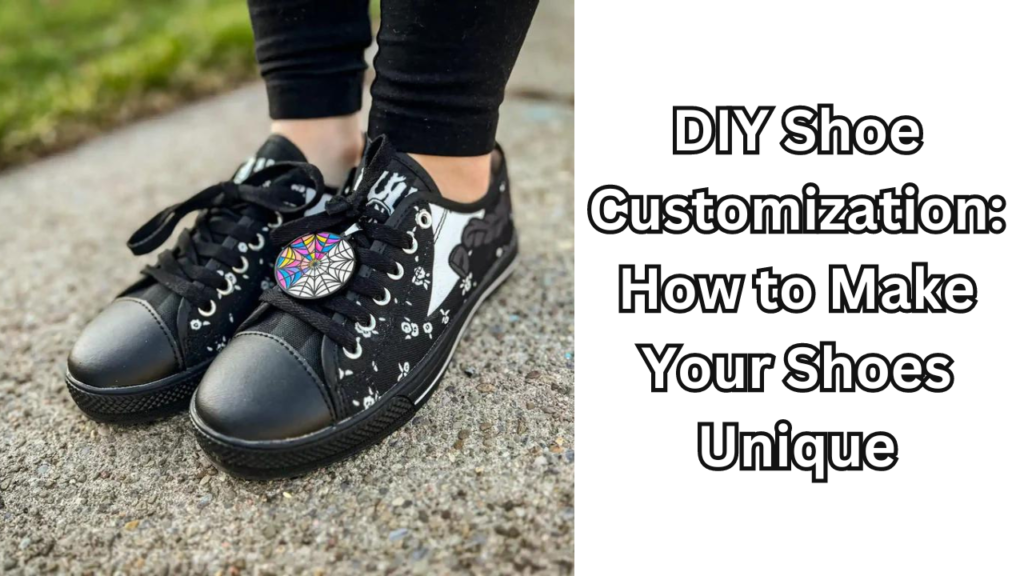
In a world where personal expression is increasingly valued, customizing your shoes has emerged as a popular trend. Whether you’re looking to stand out from the crowd, reflect your unique style, or simply breathe new life into old footwear, DIY shoe customization offers a creative outlet for individuality. This guide will explore the world of shoe customization, providing you with the tools and inspiration to make your footwear truly one-of-a-kind.
Overview of Shoe Customization
Shoe customization involves modifying and decorating shoes to fit personal tastes and preferences. This process can range from simple alterations, like changing laces or adding stickers, to more elaborate transformations, such as painting designs or attaching embellishments. The customization possibilities are endless, making it a versatile option for anyone looking to personalize their footgear. Popular techniques include painting with fabric or leather paints, applying decals or patches, and adding decorative elements like beads and rhinestones. With the right materials and techniques, you can turn any pair of shoes into a statement piece that reflects your personality and style.
Benefits of Personalizing Your Shoes
Unique Style Expression: One of the most significant advantages of customizing your shoes is the ability to create a look that is uniquely yours. In a market flooded with mass-produced footwear, personalized shoes stand out and showcase your individuality. Custom designs can express your creativity and preferences in ways that off-the-shelf options cannot.
Revitalizing Old Footwear: Customization is not just about new shoes; it’s also a fantastic way to rejuvenate and repurpose old or worn-out pairs. Instead of discarding shoes that are still structurally sound, you can give them a fresh look and extend their lifespan through creative customization. This approach is both eco-friendly and cost-effective.
Perfect Fit for Special Occasions: Customizing shoes allows you to tailor them for specific events or themes. Whether you’re preparing for a special occasion, such as a wedding or a themed party, or you simply want a pair of shoes that complements a particular outfit, customization ensures that your footwear aligns perfectly with your needs.
Increased Satisfaction and Ownership: There is a unique satisfaction that comes from creating something yourself. Customizing your shoes can be a rewarding experience, giving you a sense of ownership and accomplishment. The process allows you to experiment and explore your artistic side, resulting in a pair of shoes that you can truly be proud of.
Choosing the Right Shoes for Customization
When embarking on a DIY shoe customization project, selecting the right pair of shoes is crucial to achieving the best results. Not all shoes are equally suited for customization, so understanding which types work well and what factors to consider can make a significant difference in your project’s outcome.
Types of Shoes Suitable for DIY Shoe Customization
Canvas Sneakers: Canvas sneakers are among the most popular choices for customization due to their versatile and forgiving nature. Their fabric surface is ideal for painting, drawing, and applying decals or patches. Additionally, they are relatively easy to work with, making them a great option for beginners.
Leather Shoes: Leather shoes, including boots and dress shoes, offer a more sophisticated canvas for customization. Leather is durable and can be painted or embossed with special tools and paints. However, customization on leather requires careful preparation and specific products to ensure longevity and a smooth finish.
Athletic Shoes: Athletic shoes, such as running shoes or trainers, are another excellent option for customization. Many of these shoes have surfaces that can be painted or altered, and they often feature mesh or synthetic materials that can be customized with fabric markers or paint.
Sandals and Flats: Sandals and flats can be customized with various embellishments like beads, rhinestones, or fabric overlays. While they may not be as suitable for painting, their simple structures make them ideal for adding decorative elements.
Considerations for Material and Structure
Material Compatibility: Different materials require different approaches for customization. Canvas and fabric shoes are relatively easy to paint and draw on but may need a primer or sealant to protect the design. Leather shoes, on the other hand, require special leather paints and conditioners. Synthetic materials often require specific types of paint and adhesives to ensure the design adheres well.
Surface Preparation: Preparing the surface of your shoes is essential for a successful customization project. For canvas shoes, ensure they are clean and free of any dirt or oils. Leather shoes might need to be sanded or wiped with a leather preparer to create a smooth surface for painting or embellishing.
Durability and Flexibility: Consider the flexibility and durability of the shoe material. Shoes that bend and flex frequently, like athletic shoes, might require paints and adhesives that can withstand movement without cracking or peeling. For more rigid shoes, like dress shoes, ensure that the customization is done in a way that doesn’t compromise the shoe’s structure.
Comfort and Functionality: While aesthetics are important, don’t forget to consider the shoe’s comfort and functionality after customization. Ensure that any added embellishments or alterations do not interfere with the shoe’s fit or comfort, as this can affect their wearability.
By carefully selecting the right type of shoes and considering the material and structure, you can set yourself up for a successful and satisfying customization project. Whether you’re transforming a pair of old sneakers or giving new life to a pair of leather boots, thoughtful preparation and choice will lead to the best results.
Gathering Your Supplies
To successfully embark on a DIY shoe customization project, having the right supplies is essential. The materials and tools you choose will impact both the ease of the process and the quality of the final result.
Basic Tools and Materials Needed
Paints: Depending on your shoe material, you’ll need appropriate paints. Fabric paint works best for canvas shoes, while acrylic paint can be used for a variety of surfaces. Leather paints are specifically designed for leather shoes and provide a durable finish.
Brushes: A selection of brushes in various sizes will help you achieve different details and effects. Smaller brushes are useful for intricate designs, while larger ones are ideal for covering larger areas.
Fabric and Embellishments: If you plan to add fabric overlays, patches, or embellishments like beads and rhinestones, gather these materials along with a strong adhesive suitable for the shoe material.
Adhesives: Use a fabric or leather glue to attach embellishments securely. Be sure it’s compatible with the material of your shoes to avoid any damage.
Optional Tools for Advanced Techniques
Airbrush: An airbrush kit allows for smooth and even application of paint, perfect for gradient effects or detailed artwork. It requires some practice but can elevate your customization to a professional level.
Stencils: Stencils can help achieve precise patterns and designs. They are particularly useful for repeating motifs or geometric patterns and can be made or purchased in various shapes and sizes.
Designing Your Customization
Creating a well-thought-out design is key to a successful shoe customization project.
Sketching Your Design Ideas
Before you start customizing, sketch out your design ideas. This helps visualize the final product and allows you to make adjustments before committing to the actual customization. Use paper or a digital tool to experiment with different patterns, colors, and placements.
Finding Inspiration
Fashion Trends: Stay up-to-date with current fashion trends to find inspiration that resonates with contemporary styles. Women fashion magazines, blogs, and social media platforms are excellent resources for discovering popular patterns and color schemes.
Personal Style: Draw inspiration from your personal style and preferences. Customization is an opportunity to express yourself, so consider what styles, colors, and themes you love and how you can incorporate them into your design.
Preparing Your Shoes for Customization
Proper preparation of your shoes is crucial to ensure that your customization adheres well and looks professional.
Cleaning and Priming Surfaces
Cleaning: Clean your shoes thoroughly to remove any dirt, oils, or residues. For canvas shoes, a gentle detergent and water solution can be used, while leather shoes may require a specialized leather cleaner.
Priming: For some materials, applying a primer can help the paint adhere better and provide a smoother finish. Fabric shoes might benefit from a fabric primer, while leather shoes may require a leather preparer.
Protecting Areas Not to Be Customized
Use painter’s tape or masking tape to cover areas of the shoe that you don’t want to paint or alter. This ensures that only the intended areas are customized and prevents accidental spills or smudges.
Painting Techniques
Mastering painting techniques will significantly enhance the quality of your shoe customization.
Choosing the Right Type of Paint
Acrylics: Acrylic paints are versatile and can be used on various surfaces, including canvas and synthetic materials. They are fast-drying and offer vibrant colors.
Leather Paints: Specifically designed for leather, these paints are flexible and durable, making them ideal for shoes that will undergo regular wear.
Tips for Applying Paint Evenly
- Thin Coats: Apply paint in thin, even coats to prevent drips and ensure a smooth finish. Allow each coat to dry completely before applying the next.
- Brush Strokes: Use long, consistent brush strokes to avoid streaks and uneven areas. A steady hand and patience will help achieve a professional-looking result.
Creating Different Effects
- Gradient: Achieve a gradient effect by blending colors while the paint is still wet. Use a sponge or brush to softly transition between hues.
- Splatter: For a more dynamic look, use a toothbrush or similar tool to splatter paint onto your shoes. This technique adds texture and visual interest.
Adding Fabric or Embellishments
Enhancing your shoes with fabric or embellishments is a fantastic way to add texture and personality to your custom designs. These elements can transform the look of your footwear and provide a unique touch.
Using Fabric or Patches to Add Texture
Fabric Overlays: Applying fabric overlays can completely change the look and feel of your shoes. Choose fabrics that complement or contrast with your existing design. Cut the fabric to the desired shape and size, then use a strong adhesive or fabric glue to attach it to the shoe. Ensure that the fabric is smooth and free of wrinkles for a clean finish.
Patches: Patches are a quick and easy way to add a design element. They come in various shapes, sizes, and designs, making them versatile for different customization projects. Simply iron or sew the patches onto your shoes, following the instructions provided with the patches. For added durability, consider using a fabric glue or stitching the patches in place.
Attaching Embellishments (Rhinestones, Studs)
Rhinestones: Rhinestones can add sparkle and glamour to your shoes. Use a strong adhesive specifically designed for embellishments to attach them securely. Apply a small amount of glue to the back of each rhinestone and place it carefully on the shoe. Allow the glue to dry completely before wearing.
Studs: Adding studs gives a bold, edgy look. You can use studded embellishments that can be glued or attached with rivets. Position the studs where you want them, then secure them using the appropriate method. For rivets, you may need a tool to attach them firmly.
Customizing Laces and Eyelets
Personalizing your laces and eyelets can enhance the overall look of your customized shoes and add a cohesive touch to your design.
Painting or Dyeing Laces
Painting: Fabric laces can be painted using fabric paint. Lay the laces flat and apply the paint evenly using a brush or sponge. Allow the paint to dry completely before lacing them back into your shoes. For a gradient effect, blend different colors while the paint is still wet.
Dyeing: Dyeing laces can achieve vibrant, long-lasting colors. Use a fabric dye suitable for the lace material and follow the instructions on the dye package. Ensure that you thoroughly rinse and dry the laces before using them.
Replacing or Decorating Eyelets
Replacing Eyelets: If you want a fresh look or need to replace damaged eyelets, you can use eyelet kits available at craft stores. Choose eyelets that match your design and follow the kit instructions for installation. This can refresh the shoe’s appearance and ensure the eyelets function correctly.
Decorating Eyelets: Add decorative elements to eyelets for a unique touch. You can use eyelet covers or rings in different colors and finishes. Simply snap or glue these covers over the existing eyelets to match your customization theme.
Incorporating Artistic Elements
Artistic touches can elevate your custom shoes, making them truly unique and reflective of your creativity.
Hand-Painting Designs
Designing: Plan your design carefully, sketching it out on paper or using digital tools. Use fabric or leather paint for your hand-painted designs, applying it with fine brushes for detailed work. Start with lighter colors and build up layers to achieve the desired effect.
Techniques: Experiment with different painting techniques, such as stippling for texture or blending colors for gradients. Practice on a scrap piece of fabric or paper before applying to your shoes to ensure you achieve the look you want.
Adding Embroidery or Stitching
Embroidery: Adding embroidery to your shoes can create intricate and personalized designs. Use embroidery floss or thread and a needle to stitch patterns directly onto the fabric or leather. This method requires patience and a steady hand but can produce beautiful, detailed designs.
Stitching: For a more subtle touch, consider using decorative stitching. You can add contrasting stitches along seams or edges to enhance the shoe’s design. Use a sewing machine or hand-stitching techniques, depending on the complexity of the design.
Using Transfers and Decals
Transfers and decals are convenient methods for adding detailed designs to your shoes with minimal effort.
Applying Heat Transfer Vinyl (HTV)
Preparation: Design your transfer using heat transfer vinyl and a cutting machine or purchase pre-made designs. Cut the vinyl to fit your shoe, ensuring it aligns with your design vision.
Application: Position the vinyl on the shoe, cover it with a protective sheet, and use a heat press or iron to apply it. Follow the vinyl manufacturer’s instructions for temperature and pressing time. Allow it to cool before handling to ensure a strong bond.
Positioning and Adhering Decals
Placement: Carefully position your decals on the shoe to achieve the desired look. Use a ruler or template to ensure even spacing and alignment.
Adhering: Apply the decals according to the manufacturer’s instructions. Press down firmly and smooth out any bubbles or wrinkles. Allow the decals to set for the recommended time to ensure they adhere properly.
By incorporating these techniques, you can take your shoe customization to the next level, making your footwear a true reflection of your unique style and creativity.
Adding Functional Customizations
Enhancing the functionality of your customized shoes not only improves comfort but also extends their lifespan and usability. Here are some practical customization options to consider:
Enhancing Comfort (Inserts, Padding)
Inserts: Adding cushioned inserts can significantly increase the comfort of your shoes. Choose inserts designed for arch support, shock absorption, or extra cushioning. These can be particularly useful for shoes that are worn frequently or for extended periods.
Padding: For additional comfort, consider adding padded insoles or lining. This can help reduce pressure points and make your shoes more comfortable to wear. Fabric or foam padding can be cut to size and attached using adhesive or sewn into place.
Making Shoes Waterproof or More Durable
Waterproofing: To protect your shoes from water damage, apply a waterproofing spray or treatment suitable for the shoe material. This is especially important for fabric and leather shoes, which can be prone to moisture damage. Be sure to apply the treatment in a well-ventilated area and follow the manufacturer’s instructions.
Durability Enhancements: Reinforce high-wear areas, such as the toe box or heel, with additional layers of fabric or protective coatings. Using a clear sealant or protective coating can also help to prevent scuffs and abrasions, preserving your custom design for a longer time.
Finishing Touches
The final details can make a big difference in the overall appearance and longevity of your customized shoes.
Sealing and Protecting Your Design
Sealing: To protect your paint or embellishments, apply a clear sealant designed for your specific shoe material. This will help lock in your design and prevent it from fading or wearing off. For fabric shoes, use a fabric sealant, while leather shoes may require a leather-specific protectant.
Protecting: If you’ve added any fabric or patches, ensure they are securely attached and protected from fraying or peeling. Consider using a fabric adhesive or clear sealant around the edges to keep everything in place.
Cleaning Up Any Imperfections
Touch-Ups: If you notice any paint smudges or areas where the design didn’t turn out as expected, carefully touch up these areas with a fine brush or paint pen. Make sure to blend the touch-up work with the surrounding design for a seamless look.
Removal of Excess Materials: Trim any excess fabric or glue that may have seeped onto areas where it shouldn’t be. Use a craft knife or scissors carefully to avoid damaging the shoe.
Care and Maintenance of Customized Shoes
Maintaining your customized shoes is essential to keeping them looking their best and ensuring the longevity of your design.
Tips for Preserving Your Design
Regular Maintenance: Clean your shoes regularly according to the material type to avoid buildup of dirt or grime that can damage your design. Use appropriate cleaning products and methods to maintain the integrity of your customizations.
Storage: Store your customized shoes in a cool, dry place away from direct sunlight to prevent fading or deterioration. Use shoe trees or stuff them with tissue paper to help retain their shape.
Cleaning and Storing Customized Shoes
Cleaning: For general cleaning, use a soft brush or cloth to remove surface dirt. For more thorough cleaning, follow the specific care instructions for your shoe material. Avoid soaking or using harsh chemicals that could damage your custom design.
Storing: Keep your shoes in a dust bag or box when not in use. If your shoes have delicate embellishments, consider wrapping them in a soft cloth to protect them from scratches and other damage.
Troubleshooting Common Issues
Even with careful customization, you might encounter some issues. Here’s how to address common problems:
Fixing Paint Smudges or Peeling
Touch-Up Paint: If paint smudges or peels, carefully clean the affected area and apply a matching paint to fix the issue. Use a fine brush and blend the touch-up work with the surrounding paint. Allow it to dry thoroughly before handling.
Preventive Measures: To prevent future smudging or peeling, ensure that the paint is fully dry before wearing the shoes and apply a clear sealant to protect the design.
Repairing Damaged Embellishments
Reattachment: If rhinestones, studs, or other embellishments become loose, carefully reattach them using the appropriate adhesive. Clean the area first to remove any residue and apply a strong adhesive to ensure a secure bond.
Replacement: For damaged or missing embellishments, replace them with new ones. Match the size and style of the original embellishments to maintain the consistency of your design.
By following these guidelines, you can ensure that your customized shoes not only look fantastic but also remain functional and durable over time. Proper care and maintenance will keep your creative designs looking fresh and stylish for years to come.
Conclusion
DIY shoe customization your shoes is more than just a creative endeavor—it’s a way to express your individuality and bring a personal touch to your footwear. From selecting the right materials to adding artistic elements and ensuring durability, every step of the customization process offers opportunities to infuse your unique style into your shoes. By following the guidelines and techniques outlined in this guide, you can create one-of-a-kind footwear that not only stands out but also reflects your personal flair.
Encouraging Creativity and Experimentation
Don’t be afraid to push the boundaries and explore new ideas in your shoe customization projects. The beauty of DIY shoe customization lies in the freedom to experiment with different techniques, colors, and designs. Whether you’re trying out new painting methods, adding unexpected embellishments, or incorporating unique materials, each project is an opportunity to learn and grow as a creator. Embrace your creativity, take risks, and let your imagination guide you in transforming your shoes into personalized works of art.
Sharing Resources and Communities for Further Inspiration
For those looking to expand their customization skills and find new inspiration, numerous resources and communities are available. Online forums, social media groups, and DIY blogs offer a wealth of ideas and techniques shared by fellow enthusiasts. Websites like Pinterest and Instagram are excellent platforms for discovering trending designs and connecting with other shoe customization artists. Additionally, craft stores and online retailers often provide tutorials and materials specifically for shoe customization.
Joining these communities can provide support, feedback, and new ideas, helping you stay motivated and inspired in your creative journey. Sharing your own projects and learning from others can be incredibly rewarding, fostering a sense of connection and camaraderie among fellow DIYers.
By embracing creativity and engaging with the broader customization community, you’ll continue to discover new ways to make your shoes truly unique. Enjoy the process, celebrate your achievements, and keep exploring the endless possibilities of shoe customization.